How to Check Talaria Chain Tension Step by Step
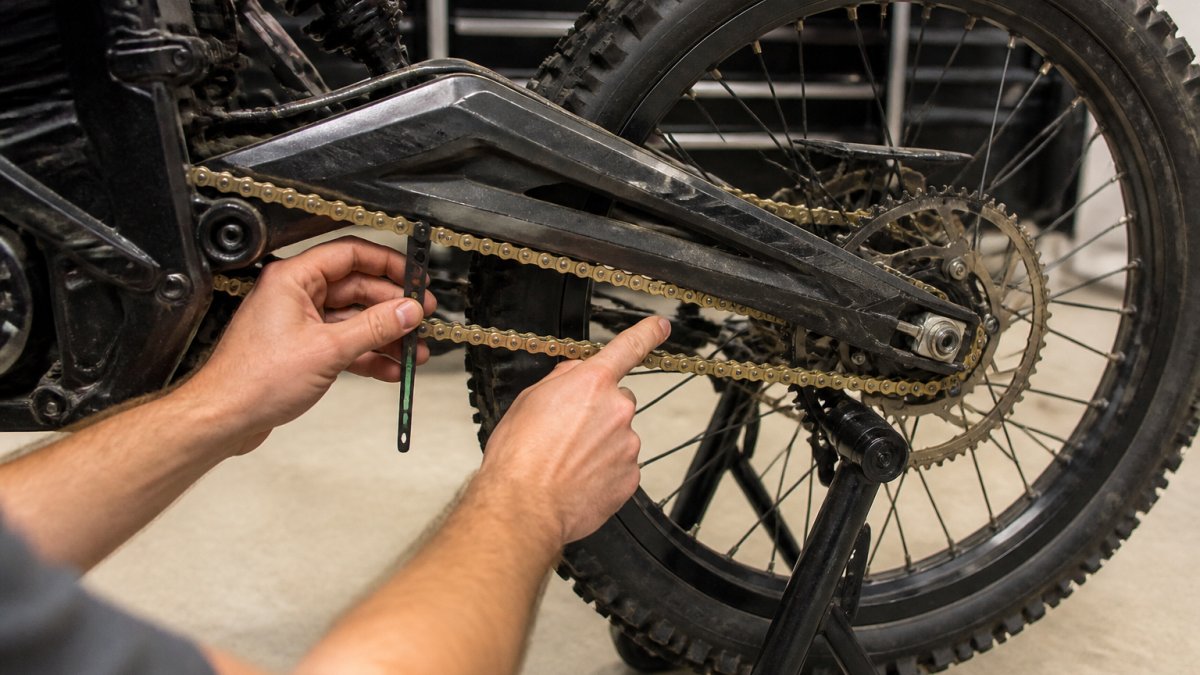
Table of Contents
- Why Talaria Chain Tension Matters More Than You Think
- What You'll Need Before You Start
- Step 1: How to Measure Motorcycle Chain Slack on a Talaria
- Step 2: Reading the Numbers (What's In Spec)
- Step 3: Talaria Chain Adjustment Without Breaking Anything
- Talaria Chain Too Tight Symptoms to Watch For
- Electric Motorcycle Chain Maintenance Between Adjustments
- Troubleshooting: When the Chain Won't Stay in Spec
- Frequently Asked Questions
Last Updated: October 17, 2026
Why Talaria Chain Tension Matters More Than You Think
A loose chain is the cheapest way to wreck an expensive electric dirt bike. On a Talaria, the chain carries every bit of motor torque to the rear wheel without the cushioning of a gearbox. Get talaria chain tension wrong and you will feel it: sloppy acceleration, a whine under load, and eventually a chain that jumps the sprocket mid-corner.
Riders often ignore the chain until it slaps the swingarm, then overtighten it to "fix" the noise. Both extremes cost money.
Here is the short version: you check slack at the midpoint between the sprockets, you measure vertical play, and you keep it inside spec. Below, we walk through the whole how to check Talaria chain tension step by step process, from tools to torque.
What You'll Need Before You Start
Gather your tools first so you are not hunting for a socket mid-job. A clean, well-lit workspace makes the measurement repeatable.
- A rear stand or a way to lift the rear wheel off the ground
- A tape measure or a small ruler in millimeters
- A 17 mm and 19 mm socket or wrench, depending on your axle hardware
- A torque wrench that reads in the range your axle nut needs
- Chain lube and a clean rag
- A helper, optional but handy for the alignment check
You also need a flat, level surface. Measuring on a slope or with the bike leaning on a kickstand throws off your reading.
Talaria models vary, so confirm your axle nut size against your own bike before you start cranking. If you are unsure, our team can provide personalized support.
Step 1: How to Measure Motorcycle Chain Slack on a Talaria
Learning how to measure motorcycle chain slack correctly is the whole ballgame. The number you read is only as good as the spot you measure it.
Start with the bike on the stand, rear wheel off the ground, transmission in neutral. Spin the rear wheel a few times and stop so the chain settles into its normal running position.
Finding the Midpoint Between the Sprockets
Measure from the center of the front sprocket to the center of the rear sprocket. Find the halfway point along the bottom run of the chain. That midpoint is where you take your reading.
That is where the chain has the most room to move; measuring near a sprocket gives you a false, tight number.
The Push-and-Release Measurement
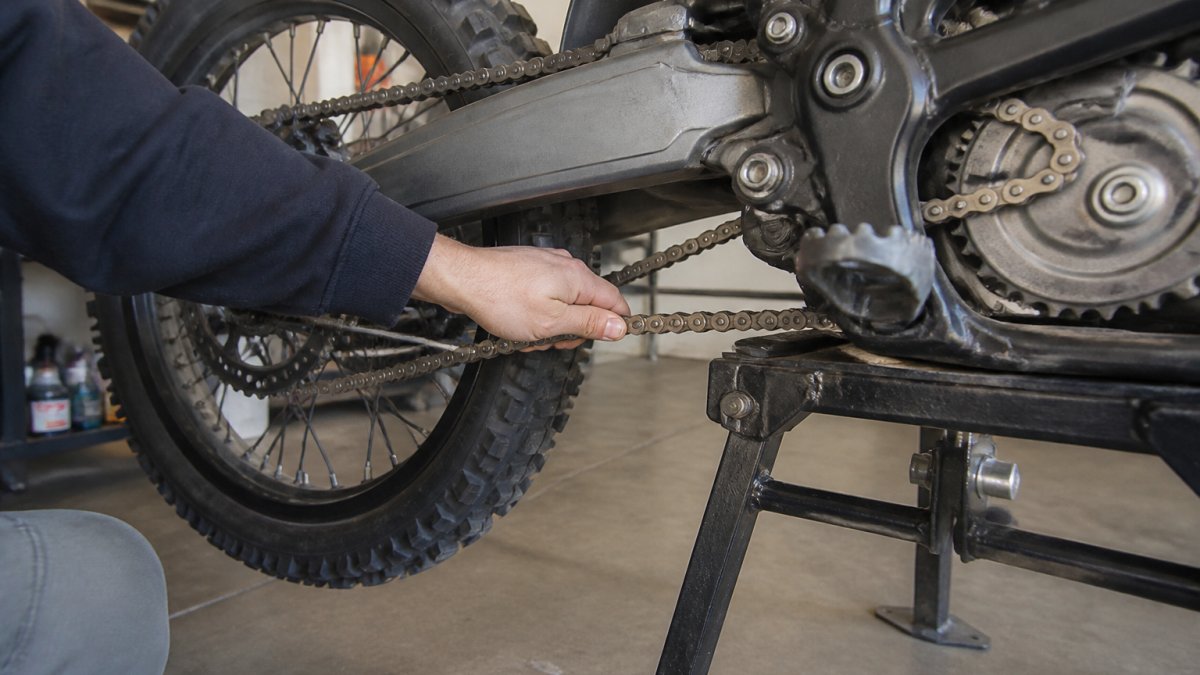
Push the chain upward with light finger pressure, let it go, then push it downward and measure the total distance it travels. That total is your vertical play.
Do not muscle it, firm, even pressure gives a true reading, while yanking stretches your measurement and makes a tight chain look fine.
Take three readings along the midpoint and average them. If the numbers jump around, you likely have a tight spot, which we cover below.
Step 2: Reading the Numbers (What's In Spec)
Most Talaria guides quote a single slack number and move on, but Talaria has shipped several distinct models and model years, and the correct figure is not identical across all of them. A number that is right for one bike can be wrong for yours.
Why a Single Number Is Not Enough
Chain slack spec accounts for suspension travel, sprocket size, and swingarm geometry; change any of those and the safe window shifts. Treat any number you read online, including the ranges below, as a starting point, not gospel. The authoritative figure is the one in the owner's manual or service documentation for your exact model and model year.
A Model-Aware Way to Read Your Result
Rather than memorizing one number, read your measurement against three zones:
| Zone | What It Looks Like | What It Means |
|---|---|---|
| Too tight | Chain feels rock hard, almost no vertical movement, whines under load | Loosen before riding, bearing and sprocket damage risk |
| Working range | Chain moves freely with light finger pressure, returns without slapping | Confirm against your manual's spec, then ride |
| Too loose | Chain sags visibly, slaps the swingarm over bumps, skips under hard acceleration | Adjust now, derailment and case damage risk |
Most Talaria owners report a working range in the low double digits of millimeters of vertical play at the midpoint, but the exact window varies by model. Pull the number from your manual and tape it to your toolbox so you stop second-guessing it.
The Measurement Conditions That Change the Number
Even a correct spec reads wrong under the wrong conditions. Three variables move the number most:
- Suspension position. Chain slack is tightest when the swingarm is at its longest extension point, usually when the rear axle, swingarm pivot, and front sprocket are aligned. If you measure with the bike on a stand (rear wheel hanging), you are reading near the loose end of the range. That is fine for a quick check, but confirm the final setting with the bike on the ground and the rider's weight on it, or per your manual's stated procedure.
- Tight spots. A worn chain does not stretch evenly. Spin the rear wheel slowly and take readings at several points along the bottom run. The tightest spot is the one that governs your setting, if you set slack at a loose spot, the tight spot will be over-tensioned when it rotates into load.
- Chain temperature and lube state. A freshly lubed chain reads slightly tighter than a dry one. Measure consistently, same conditions each time, so your numbers are comparable.
If your reading lands outside the working range, move to the adjustment step. If it is inside, you are done checking and can move on to lubing and alignment verification.
Step 3: Talaria Chain Adjustment Without Breaking Anything
Adjustment is a five-minute job once you understand the order of operations and the two failure modes that ruin the result: an axle that creeps while you torque it, and an alignment that looks right but is not.
Tools and Setup
Have these within arm's reach:
- The correct socket or wrench for your rear axle nut, Talaria models vary, so confirm the size against your own hardware rather than assuming
- A torque wrench that covers the range your manual specifies for the axle nut
- Two adjuster wrenches or the size called for by your swingarm's adjuster bolts
- A tape measure or small ruler in millimeters
- A straight edge or string line for alignment
- Chain lube and a clean rag
Put the bike on a stand with the rear wheel off the ground, transmission in neutral, on a flat, level surface, measuring on a slope or with the bike leaning throws off every reading.
Loosening the Rear Axle Nut
Break the rear axle nut loose before you touch the adjusters, back it off just enough that the axle can slide in the swingarm slots. Hold the axle on the opposite side so it does not spin; a second wrench or a helper makes this easier.
Do not fully remove the nut. Leaving it threaded keeps the axle captured and prevents the wheel from dropping out unexpectedly.
Turning the Adjuster Bolts and Keeping the Axle Aligned
Each side of the swingarm has an adjuster bolt. Turn them a quarter turn at a time and check slack after each pass, a quarter turn moves the axle more than most riders expect.
Alignment is the part most riders rush and the part that costs the most when wrong. Count your turns and keep the left and right adjusters matched. Use the swingarm marks as a starting point, but do not trust them alone, stamped marks can be off by a millimeter or more.
To verify alignment, run a straight edge or string line along the side of the rear sprocket forward to the front sprocket; the chain should run straight and centered on both. A misaligned rear wheel eats sprockets, makes the bike track crooked, and can cause the chain to walk off under load.
Retightening and Rechecking
Torque the axle nut to your model's spec with a torque wrench, do not guess or 'snug it good.' Tightening the axle can pull the chain tighter, so recheck slack after you torque; if the reading moved out of spec, loosen the nut slightly and repeat the adjuster pass.
Spin the wheel and watch the chain run, it should track straight and quiet with no side-to-side wander. If it wanders, your alignment is off; redo the straight-edge check before you ride.
What to Check If the Axle Creeps While You Torque
A common pattern is the axle sliding forward in the swingarm slot as you tighten the nut, pulling the chain tighter than you set it. Hold the adjuster bolts against the swingarm while you torque, or torque in two stages, half spec, recheck slack, then full spec. If it still creeps, inspect the adjuster bolts and swingarm slot for wear or debris; a stripped slot will never hold tension.
After the First Ride
Recheck slack after your first short ride following any adjustment, new settings settle, and a chain in spec on the stand can read differently under load. If tension has drifted, repeat the adjustment sequence rather than cranking the adjusters tighter; drift usually points to a creeping axle or a worn chain, not a setting error.
Talaria Chain Too Tight Symptoms to Watch For
Talaria chain too tight symptoms show up fast and are easy to miss if you are not listening. Catching them early saves bearings and sprockets.
- A whining or humming noise that rises with speed
- The bike feeling sluggish off the line
- Vibration through the pegs
- Visible wear on the front sprocket teeth
- A chain that feels rock hard with almost no give
A tight chain also strains the motor output shaft bearing, the expensive one. If you hear a constant whine that changes with throttle, back off the tension and recheck.
The opposite problem has its own tells: a slapping sound over bumps, a chain that looks like it is sagging, and rough power delivery as the chain skips teeth under load.
Electric Motorcycle Chain Maintenance Between Adjustments
Electric motorcycle chain maintenance is simpler than on a gas bike but still matters. No exhaust heat or oil mist keeps the chain cleaner, but it still stretches and still needs lube.
Clean the chain with a rag and proper chain cleaner, then relube while it is warm after a ride, a dry chain wears fast.
Check slack every few rides and always after a big jump or hard landing. Electric motors deliver instant torque, which works the chain harder than a gas engine of similar power.
Watch for tight spots: spin the wheel slowly and feel tension at several points. If one spot is noticeably tighter, the chain is wearing unevenly and may be near the end of its life.
Troubleshooting: When the Chain Won't Stay in Spec
If you set the tension and it drifts within a ride or two, something else is going on. Look here first.
- The axle nut is not holding torque. A stretched or dirty axle nut can back off. Clean the threads and retorque to spec.
- The adjusters are slipping. Worn adjuster bolts or a stripped swingarm slot let the axle creep forward.
- The chain is worn out. A stretched chain will not hold tension no matter how many times you adjust it. Measure a section against the manual's wear limit.
- The sprockets are hooked. Worn teeth let the chain ride high and change your effective slack.
If you have checked all four and the chain still will not behave, bring it in. Our team works on bikes we did not sell and can help diagnose the issue.
Frequently Asked Questions
How much slack should a Talaria chain have?
Most Talaria models want roughly 10-15 mm of vertical play at the chain's midpoint when measured on a stand, though the exact figure varies by model and swingarm position. Check your owner's manual for the spec that matches your bike. Too little slack loads the countershaft bearing and sprockets; too much lets the chain slap the swingarm and risk jumping a tooth under load.
How do you check chain tension on a Talaria?
Put the bike on a stand so the rear wheel spins freely, find the midpoint between the front and rear sprockets, and push the chain up and down. Measure the total vertical movement in millimeters. Rotate the wheel and repeat at several points, because a worn chain tightens at certain spots. If the reading falls outside spec, move on to Talaria chain adjustment.
What happens if a Talaria chain is too tight?
An overtightened chain puts constant load on the countershaft bearing, the rear wheel bearings, and the sprocket teeth. Common Talaria chain too tight symptoms include a whining or grinding noise, a stiff rear suspension that resists compression, and accelerated chain stretch. Left alone, it can cost you a bearing or a sprocket set, so slacken it back into spec before your next ride.
How often should you check Talaria chain tension?
Check it before every ride with a quick push test, and do a full measured check every few rides or after any hard off-road session. New chains stretch fastest in the first few hundred miles, so check more often during break-in. If you ride in dust or mud, clean and lubricate the chain after each session as part of your electric motorcycle chain maintenance routine.
Keeping your Talaria dialed takes a few minutes and a couple of tools, but it protects the parts that cost real money. If you would rather have it done right the first time, Untamed Racing offers hands-on service for every e-moto brand, expert tuning, and access to premium parts and upgrades. We are a family-run shop, so you get a real person who rides these bikes, not a call center. Get started with Untamed Racing and keep your chain, sprockets, and motor running hard.