How to Bleed Hydraulic E-Moto Brakes at Home
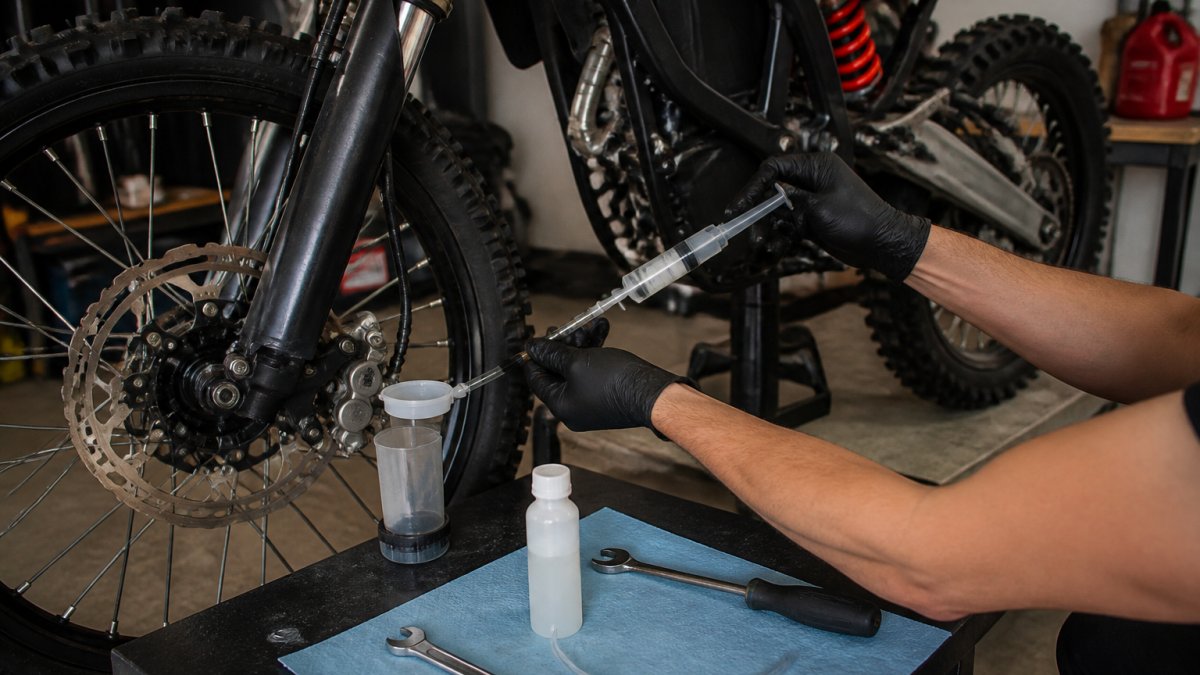
Table of Contents
- Why E-Moto Brakes Go Spongy and What Bleeding Fixes
- E-Moto Brake Bleeding Tools and Home Setup
- Hydraulic Brake Mineral Oil vs DOT Fluid: Match Your System
- Step-by-Step: How to Bleed Hydraulic E-Moto Brakes at Home
- Spongy Hydraulic Brakes After Bleeding: What Went Wrong
- Hydraulic Brake Bleeding Mistakes That Cost You Lever Feel
- When to Bleed Hydraulic E-Moto Brakes Yourself and When to Book Service
- Conclusion
- Frequently Asked Questions
Last Updated: October 14, 2026
Why E-Moto Brakes Go Spongy and What Bleeding Fixes
A spongy brake lever means air is trapped in your hydraulic line; bleeding pushes that air out so the lever firms up. This guide from Untamed Racing walks you through how to bleed hydraulic e-moto brakes at home with basic tools.
Hydraulic brakes move fluid, not cables: pulling the lever pushes fluid to the caliper pistons, and the pads clamp the rotor. Air compresses, fluid does not, so even a small bubble steals lever pressure.
Common signs you need a bleed:
- The lever pulls almost to the grip
- Braking feels soft or vague
- The lever slowly sinks while you hold it
Bleeding fixes all of these by replacing old fluid and removing trapped air.
E-Moto Brake Bleeding Tools and Home Setup
You do not need a full shop to bleed brakes at home, but you must know which system you are working on before buying tools. Most failed home bleeds start with the wrong fluid or fitting, not bad technique.
Step 0: Identify Your Brake System First
Before you gather anything, confirm three things:
- The fluid spec. Check the lever body, reservoir cap, or caliper for markings like "DOT 4," "DOT 5.1," or "Mineral Oil." If there is none, check the owner's manual or manufacturer's service page. Do not guess.
- The bleed port location. Most e-moto calipers have one bleed nipple on the caliper body, but some also have a port at the lever or master cylinder. Trace the hose and note every fitting.
- The fitting size. Bleed nipples are commonly 7 mm, 8 mm, or 10 mm. A cheap set of open-end wrenches in those sizes covers most systems.
If you cannot confirm the fluid type, stop and look it up. Mixing mineral oil and DOT fluid can swell seals and cause a total loss of braking.
What You'll Need Before You Start
Gather everything first so you are not hunting mid-job:
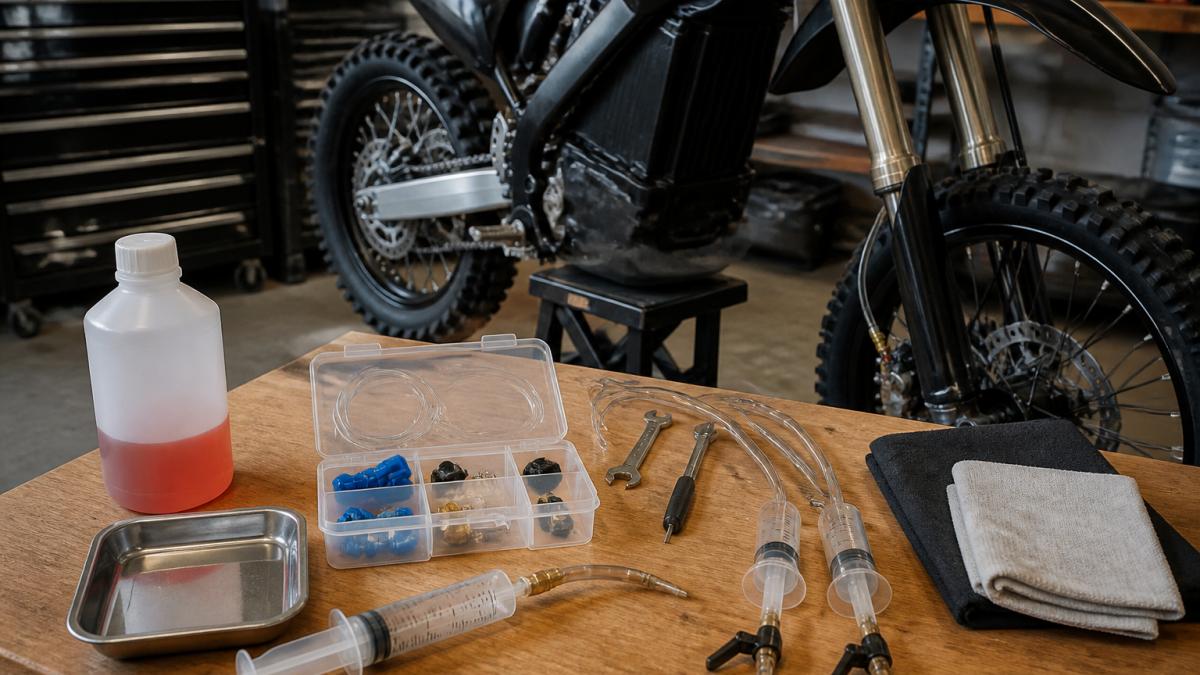
- A bleed kit with syringes, tubing, and a bleed hose (or a DIY kit, see below)
- The correct brake fluid for your system
- A funnel or bleed cup for the reservoir
Low-Cost Alternatives to a Dedicated Bleed Kit
A dedicated bleed kit is convenient but not mandatory for a first bleed. A common home setup uses:
- A 60 mL or 100 mL syringe from a pharmacy or farm supply store
- Clear vinyl tubing sized to slip over the bleed nipple (often 4 mm or 5 mm inner diameter)
- A small catch bottle or jar for old fluid
Buy a dedicated kit if you bleed often, your system uses a proprietary fitting, or the manufacturer specifies an adapter. With a standard nipple, the DIY route works fine.
Prepare the Workspace
Work somewhere with good light and no wind. Dust and grit are the enemy of an open hydraulic system.
- Lay down cardboard or a shop mat to catch drips.
- Keep isopropyl alcohol and rags within reach before you open anything.
- Cover the rotor and pads with a clean rag or plastic sheet so fluid cannot contaminate them.
Check the Service Manual for Your Model
Port locations, bleed direction, fitting sizes, and torque vary by model, and some systems bleed from the caliper up while others use gravity or vacuum. Find the service manual or manufacturer's maintenance page for your exact e-moto; if you cannot, contact the manufacturer or a shop that services your model.
Hydraulic Brake Mineral Oil vs DOT Fluid: Match Your System
Mineral oil and DOT fluid are not interchangeable; mixing them can wreck seals and ruin braking.
DOT fluid, usually DOT 4 or 5.1, is glycol-based, absorbs water over time, and needs regular changes.
Mineral oil, used by many e-moto and e-bike brands, does not absorb water the same way and is gentler on finishes.
| Fluid Type | Common Use | Key Trait | Watch Out For |
|---|---|---|---|
| DOT 4 / 5.1 | Many performance systems | Handles high heat | Strips paint, absorbs water |
| Mineral oil | Many e-moto and e-bike setups | Gentle on seals | Not for DOT systems |
| DOT 5 | Rare, silicone-based | Does not absorb water | Never mix with DOT 4 |
Step-by-Step: How to Bleed Hydraulic E-Moto Brakes at Home
Here is the full process, split into three stages. Total time runs about 30 to 45 minutes per brake.
Total Time: 30-45 minutes per brake Difficulty: Beginner to intermediate
Step 1: Prep the Bike, Lever, and Caliper
Start by getting the bike stable and the brake reachable. A steady bike means fewer spills and cleaner work.
- Put the bike on a stand or strap it upright.
- Remove the wheel if the caliper is hard to reach, or leave it on for a simple top-up bleed.
- Level the brake lever so the reservoir sits flat.
- Wipe down the caliper and lever with isopropyl alcohol.
- Check your brake pads and rotor while you are in there.
Expected Result: A clean, level lever and easy access to the bleed port.
Step 2: Connect, Fill, and Flush the Line
Attach your syringe or bleed hose to the caliper bleed port, then push fresh fluid up the line, driving old fluid and trapped air toward the reservoir.
- Fill a syringe with the correct fluid.
- Connect the bleed hose to the caliper bleed nipple.
- Open the bleed port a quarter turn.
- Push fluid slowly up the hydraulic line.
- Watch the reservoir for bubbles and rising fluid.
- Top up the reservoir as old fluid exits.
- Close the bleed port when the fluid runs clear.
Go slow. Fast pushes stir up air instead of removing it.
Step 3: Close the Port and Verify Lever Feel
Once the fluid runs clean and bubble-free, close the bleed port and check the lever. A firm lever that holds pressure means the job worked.
DNIS V6 Premium 6 Piston Front Brake →
- Tighten the bleed nipple gently. Do not overtighten.
- Clean any spilled fluid right away.
- Pump the brake lever several times.
- Hold the lever under pressure for 30 seconds.
- Reinstall the wheel and pads if removed.
- Spin the wheel and check for rotor rub.
Expected Result: A firm lever that does not sink, and a wheel that spins freely.
Spongy Hydraulic Brakes After Bleeding: What Went Wrong
If the lever still feels soft after a bleed, air is still in the system or fluid is escaping. Work through the checks below in order, easiest first.
Check 1: Air Still in the System
Air hides in three places: the caliper, the high point of the hose, and the lever body.
- Caliper: Reopen the bleed port and push a small amount of fresh fluid through. Watch for bubbles at the reservoir.
- Hose high point: Tap the hose lightly with a screwdriver handle while you push fluid. Bubbles cling to the inside wall and need a nudge to travel up.
- Lever body: Some levers trap air above the reservoir port. With the reservoir cap off, slowly cycle the lever a few times to let bubbles rise.
If bubbles keep appearing no matter how many times you bleed, you likely have a leak pulling air in.
Check 2: Fluid Level and Reservoir
A reservoir that runs dry mid-bleed pulls air into the line. Top up before every push and keep it at least half full. If the level drops on its own between rides, you have a leak.
Check 3: Leaks at Fittings, Hose, or Seals
Wipe every fitting dry, then pump the lever and hold it under pressure for 30 seconds. Look for:
- A wet ring around the bleed nipple
- Fluid at the hose crimp or banjo fitting
- Fluid around the caliper pistons
Any of these means a seal, hose, or fitting needs attention. A home bleed will not fix a failed seal.
Check 4: Contaminated Pads or Rotor
Even a little fluid on the pads or rotor makes braking weak or grabby and can mimic a spongy lever. If you suspect contamination:
- Remove the pads and inspect them.
- Clean the rotor with isopropyl alcohol and a clean rag.
- Replace pads that have absorbed fluid. Contaminated pads usually cannot be saved.
Check 5: Blocked or Partially Blocked Bleed Port
A bleed nipple clogged with old fluid or debris will not pass fluid. Remove it, inspect the passage, clean it with a thin wire or compressed air, and reinstall with a new crush washer if your system uses one.
Check 6: Wrong Fluid or Mixed Fluids
If mineral oil and DOT fluid were mixed, seals can swell and the system may never hold pressure. This is a rebuild problem, not a bleed problem: flush the system, replace the seals, and refill with the correct fluid.
When to Stop and Get Help
If all six checks fail and the lever still sinks, the likely cause is a damaged master cylinder seal, collapsed hose, or caliper piston seal. These need parts and sometimes specialized tools; a shop visit is cheaper than guessing.
Hydraulic Brake Bleeding Mistakes That Cost You Lever Feel
Most failed bleeds come down to a few repeat mistakes. Avoiding them saves fluid, time, and a second trip to the workbench.
- Using the wrong fluid type for your system
- Opening the bleed port too far and sucking in air
- Pushing fluid too fast and churning bubbles
When to Bleed Hydraulic E-Moto Brakes Yourself and When to Book Service
A routine bleed is a solid DIY job. But some symptoms point to problems a home bleed will not fix.
Do it yourself when:
- The lever just feels soft or spongy
- Fluid looks dark and needs a change
- You are doing regular maintenance
Book service when:
- The lever sinks even after a clean bleed
- You see fluid around the caliper or fittings
- The rotor is warped or pads are unevenly worn
At Untamed Racing, our team works on e-moto brakes daily, including bikes we did not sell. If your bleed keeps failing, we can trace the leak and get your lever firm again.
If you want to upgrade instead of repair, our DNIS V6 Premium 6 Piston Front Brake uses 7075 aluminum construction and DOT fluid for strong, consistent stopping power. For Surron and Talaria riders, the DNIS E-moto rear brake Surron Lbx and the DNIS E-Moto Rear Brake For Talaria XXX / MX3 / MX4 both come pre-bled and bolt straight on.


Conclusion
Soft brakes are a safety problem, not just an annoyance, and a proper bleed solves most cases in under an hour. When the lever still sinks after a clean job, the issue is usually a leak or worn parts needing a trained eye. Untamed Racing offers hands-on brake service, premium parts, and straight answers from riders who know these bikes.
Frequently Asked Questions
What tools do I need to bleed hydraulic e-moto brakes at home?
You need a bleed kit with a syringe or bleed cup, clear tubing sized to the bleed port, the correct fluid for your system, an Allen key set, a 7 or 8mm box wrench for the bleed nipple, nitrile gloves, and clean rags. A torque wrench helps you tighten the caliper and lever bolts to spec. Some riders add a small funnel for topping up the reservoir. If your caliper uses a bleed screw with a rubber cap, keep the cap on hand so you can reinstall it after the job.
Can I use mineral oil in any hydraulic brake system?
No. Mineral oil and DOT fluid are not interchangeable. Mineral oil systems use seals and hoses designed for mineral oil, and DOT fluid will swell or degrade those seals over time. DOT systems need DOT 3, 4, or 5.1 fluid, and mixing mineral oil into a DOT system can ruin the caliper and lever. Check the lever body or the manufacturer's spec before you buy fluid. If you are unsure, match the fluid to the brake that came on the bike, not to what a friend uses.
Why are my e-moto brakes still spongy after bleeding?
A spongy lever after bleeding usually means air is still trapped somewhere in the system. Common causes include not pushing enough fluid through to flush the old fluid out, letting the reservoir run dry mid-bleed, a loose bleed nipple that lets air back in, or air trapped in the caliper or the highest point of the hose. Try a second bleed, tap the hose and caliper lightly to free bubbles, and make sure the reservoir stays topped up the whole time.
Do I leave the brake reservoir open when bleeding brakes?
Yes, the reservoir cap comes off during bleeding so you can add fluid and let air escape. Keep the reservoir topped up as you push fluid through the line, because if it runs dry you will pull air straight into the system. Once the lever feels firm and no more bubbles come out, close the bleed port, reinstall the reservoir cap, and pump the lever a few times to confirm the feel before you ride.