5 Best Brake Pad Upgrades for Electric Dirt Bikes
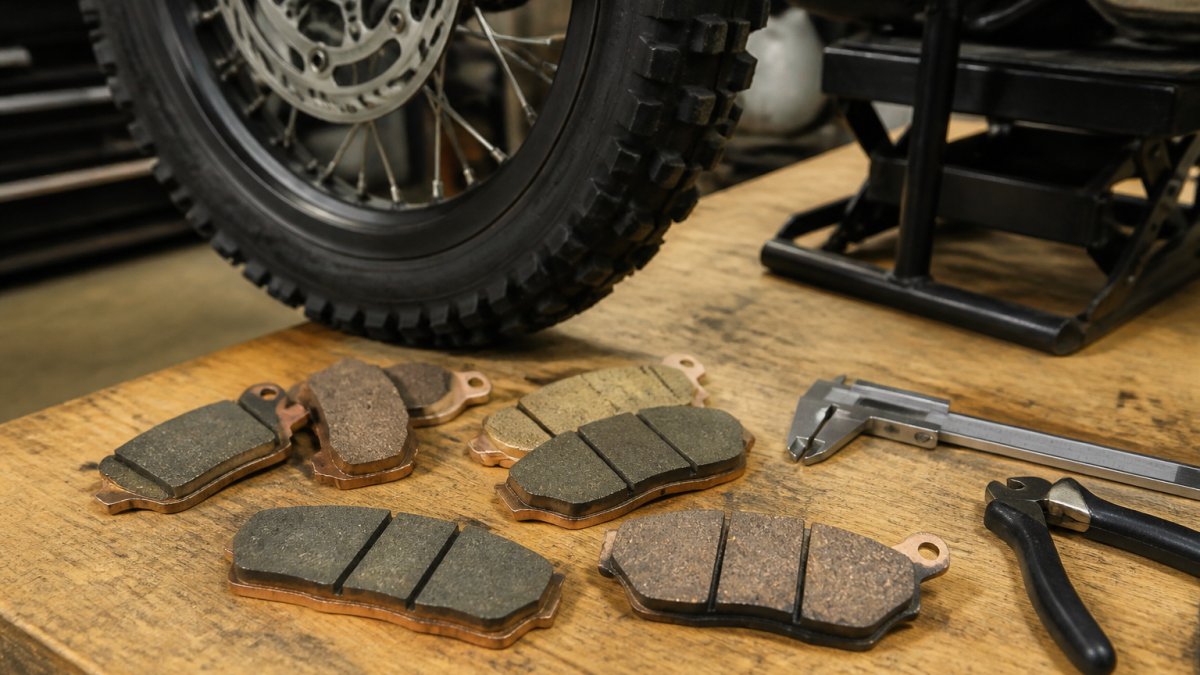
Table of Contents
- Why Brake Pad Upgrades Matter on Electric Dirt Bikes
- Quick Comparison: 5 Best Brake Pad Upgrades for E-Motos
- 1. DNIS V6 Premium 6 Piston Rear Brake: Maximum Stopping Power
- 2. DNIS E-Moto Rear Brake for Surron LBX: Best Bolt-On Kit
- 3. DNIS E-Moto Rear Brake for Talaria XXX / MX3 / MX4: Best for Talaria Riders
- Sintered vs Organic Brake Pads for E-Motos: Which Compound Wins?
- How to Bed In Electric Dirt Bike Brakes (Step by Step)
- Signs of Worn Brake Pads on Electric Dirt Bikes
- Frequently Asked Questions
Last Updated: October 4, 2026
Why Brake Pad Upgrades Matter on Electric Dirt Bikes
Electric dirt bikes are heavier than they look, and that weight changes everything about how a brake system behaves.
That imbalance is the reason brake pad upgrades matter so much. Pads are the cheapest, highest-use change you can make to how a bike stops.
Below, we break down the 5 best brake pad upgrades for electric dirt bikes, explain how sintered and organic compounds differ, and walk through bedding-in and wear checks so you know when to replace what.
Quick Comparison: 5 Best Brake Pad Upgrades for E-Motos
The fastest way to pick is to match the upgrade to your bike and your riding style.
| Upgrade | Best For | What You Get | Price |
|---|---|---|---|
| DNIS V6 Premium 6 Piston Rear Brake | Maximum stopping power, aggressive downhill | Six-piston caliper, 7075 aluminum body, heat sync, metal composite or full metal pads | $198.00 |
| DNIS E-Moto Rear Brake for Surron LBX | Bolt-on replacement for Surron LBX | Pre-bled caliper, two levers, braided hose, adapter, 240mm rotor | $221.99 |
| DNIS E-Moto Rear Brake for Talaria XXX / MX3 / MX4 | Talaria riders wanting a full kit | Same kit spec, valved for Talaria frames | $221.99 |
| Sintered pad set (metal composite) | Riders who want more bite and heat resistance | Harder compound, higher friction coefficient, longer life | Varies |
| Organic pad set | Trail riders who want quieter, gentler braking | Softer compound, quieter engagement, faster rotor wear | Varies |
For most riders, the DNIS V6 is the pick if you want the biggest single change in how the bike stops.

1. DNIS V6 Premium 6 Piston Rear Brake: Maximum Stopping Power
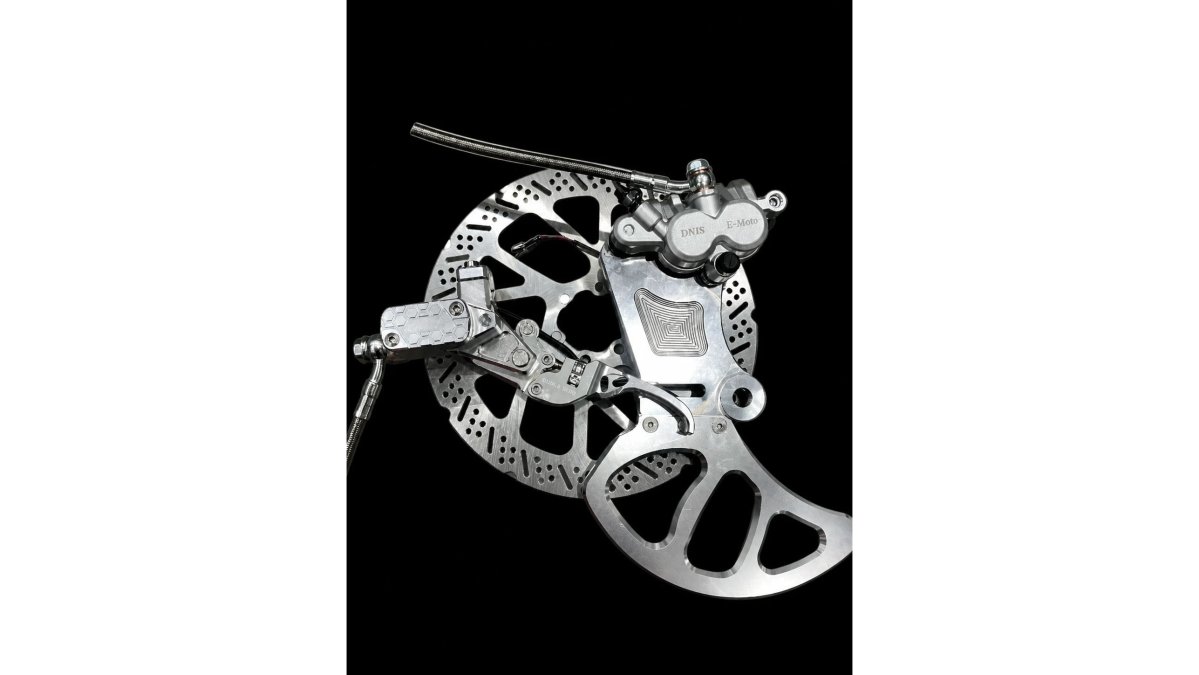
The DNIS V6 is the flagship of our brake lineup, and it earns the top spot for one reason: it delivers six-piston clamping force without the weight penalty most six-piston systems carry.

Six precision alloy pistons spread clamping force across the pad face, which is what gives the V6 its modulation.
Integrated heat sync technology actively dissipates heat during long descents, which is the V6's answer to brake fade.
Pros and Cons
Pros:
- Six-piston clamping force with a lighter body than typical six-piston calipers
- 7075 aluminum construction resists flex under hard braking
- Heat sync technology targets fade on extended descents
- Two pad options: composite for life, full metal for bite
- Fits many e-moto and MTB frames
Cons:
- Rear-only kit, so front braking still depends on your existing setup
- DOT fluid requires more careful handling than mineral oil during service
- Overkill for casual riders who never push descents hard
2. DNIS E-Moto Rear Brake for Surron LBX: Best Bolt-On Kit
If you ride a Surron LBX and want a complete rear brake replacement without piecing parts together, this kit is the straightforward answer.

The kit includes a DNIS caliper, two levers in long and shorty lengths, a 180cm braided hose, an adapter, and a 240mm x 3mm DNIS rotor. You pick the lever style and color to match your build.
CNC-machined levers with reach adjustment let you set the lever where your hand actually sits, which improves control more than most riders expect.
Pros and Cons
Pros:
- Ships pre-bled and bolt-on, so installation is fast
- Includes rotor, hose, adapter, and both lever styles
- Reinforced double-seal design holds up to heat cycling
- Reach adjustment and color options for a tailored setup
Cons:
- Specific to the Surron LBX, so it will not bolt onto other frames
- Two levers are included, but you only run one, so one sits as a spare
- Full kit means paying for a rotor even if yours is still good
3. DNIS E-Moto Rear Brake for Talaria XXX / MX3 / MX4: Best for Talaria Riders
Talaria riders get the same kit spec as the Surron version, valved and fitted for Talaria frames. If you ride a XXX, MX3, or MX4, this is the rear brake upgrade that bolts on without fabrication.
You get the CNC-machined caliper, long and shorty levers, a 180cm braided hose, adapter, and the 240mm x 3mm DNIS rotor.
DNIS V6 Premium 6 Piston Rear Brake →
Pre-bled from the factory means you install, check for leaks, and ride. Reach adjustment and color choices let you dial in the lever position for your hand size and riding posture.
Pros and Cons
Pros:
- Direct fit for Talaria XXX, MX3, and MX4 frames
- Pre-bled, bolt-on install with no bleeding required
- Braided hose resists expansion under heat and pressure
- Includes rotor, adapter, and two lever lengths
- Same reinforced double-seal design as the Surron kit
Cons:
- Not interchangeable with Surron or other frames
- Rear-only, so front brake upgrades are a separate purchase
- Rotor size is fixed at 240mm, which limits some custom builds
Sintered vs Organic Brake Pads for E-Motos: Which Compound Wins?
Sintered metal pads win for e-motos in most cases.
Organic pads use softer composite material. They engage more quietly and gently, which suits light trail riding and riders who want predictable low-speed feel. The trade-off is faster wear and less tolerance for heat.
| Factor | Sintered Metal | Organic |
|---|---|---|
| Friction coefficient | Higher | Lower |
| Heat resistance | Excellent, resists fade | Moderate, fades sooner |
| Noise | Louder when cold | Quieter |
| Pad life | Longer | Shorter |
| Rotor wear | More aggressive | Gentler |
| Best for | Downhill, aggressive riding, heavy bikes | Trail riding, quiet cruising |
Here's what most guides miss: the compound matters less than the bedding-in process. A sintered pad that was never bedded in will feel worse than a properly seated organic pad.
How to Bed In Electric Dirt Bike Brakes (Step by Step)
Bedding-in is the process of transferring a thin, even layer of pad material onto the rotor surface. Skip it, and your new pads will glaze, grab unevenly, and never reach full stopping power.
Total time: 20-30 minutes Difficulty: Beginner What you'll need: New pads installed, a safe open area, and a clean rotor free of grease or oil
- Clean the rotor. Wipe both faces with isopropyl alcohol and a lint-free cloth. Any oil left on the surface contaminates the pad and ruins the transfer layer.
- Seat the pads at low speed. Ride at a moderate pace and apply the brake gently, 10 to 15 times, coming almost to a stop each time. Do not hold the lever once stopped.
- Build heat in stages. Increase speed and brake harder, still avoiding full stops. The goal is heat cycling, not locking the wheel.
- Do a series of hard stops. From a controlled speed, brake firmly down to walking pace. Repeat 5 to 8 times, letting the brake cool slightly between runs.
- Cool down completely. Ride without braking for several minutes. Never park with a hot brake, because pad material can transfer unevenly and cause pulsing.
- Check lever feel. A properly bedded brake feels firm with a consistent bite point. If it feels spongy, check for air in the line or fluid loss.
Expected result: A firm lever, a consistent bite point, and noticeably shorter stopping distance than the first ride on new pads.
Signs of Worn Brake Pads on Electric Dirt Bikes
Worn pads announce themselves before they fail, if you know what to look for. Check these signs every few rides, especially if you ride downhill or in dusty conditions.
- Pad thickness: New pads typically measure around 4mm of friction material. Below 2mm, plan a replacement; below 1mm, stop riding.
- Wear indicator: Many pads have a groove or notch that disappears as the pad wears. When it's gone, the pad is done.
- Lever feel: A lever that travels further before biting, or feels spongy, points to worn pads, air in the line, or low brake fluid.
- Noise: Metal-on-metal grinding means the friction material is gone and the backing plate is contacting the rotor.
- Pad glazing: A shiny, glassy surface on the pad means it overheated. Glazed pads lose bite and need replacement, not sanding.
- Rotor scoring: Deep grooves or a blue tint on the rotor indicate heat damage and mechanical wear that new pads alone won't fix.
Dust accumulation is the quiet killer here. Grit trapped between pad and rotor acts like sandpaper, accelerating both pad and rotor wear. Clean the caliper area when you clean the bike.
For riders who want the whole system addressed at once, a full kit solves pad wear, rotor wear, and heat management in one job. The DNIS V6 and the model-specific Surron and Talaria kits are the three we recommend most often, and we install them for riders across the area regardless of where the bike was originally purchased.
Stock brakes on a heavy e-moto are the weak link most riders live with far too long, and a pad or full-system upgrade fixes it for less than most people assume.
Frequently Asked Questions
What is the best type of brake pad for an electric dirt bike?
It depends on how you ride. Sintered metal pads handle heat better and resist brake fade on long descents, making them the choice for aggressive trail riding and heavier e-motos. Organic compound pads run quieter and engage more smoothly at low speeds, which suits casual riders and wet conditions. For most electric dirt bike riders pushing hard on steep terrain, a sintered or metal composite pad delivers the most consistent stopping power. The DNIS V6 ships with both metal composite and full metal options so you can match the pad to your riding style.
Are sintered or organic brake pads better for electric motorcycles?
Sintered pads win for performance. They maintain a stable friction coefficient under high heat, resist pad glazing, and last longer under hard braking. Organic pads offer better initial bite when cold and produce less noise, but they wear faster and fade sooner on extended downhill braking. Electric dirt bikes carry significant weight and reach high speeds quickly, so the thermal stability of sintered metal usually matters more than the quiet engagement of organic compound.
How do I know when to replace my electric dirt bike brake pads?
Check pad thickness every few rides. Most pads start around 3-4mm of friction material and need replacing when they drop below 1mm. Other signs include a spongy or long lever feel, squealing under braking, visible wear indicators making contact, or the rotor showing deep grooves. If you notice brake fade on descents that did not happen before, the pads are likely glazed or worn. Catching wear early protects your rotor from damage and keeps stopping power predictable.
How do I bed in new brake pads on an electric dirt bike?
Bedding-in transfers a thin layer of pad material onto the rotor, which maximizes friction and prevents uneven deposits. Find a safe stretch of road or trail, accelerate to moderate speed, then brake firmly but not to a full stop. Repeat this 10 to 15 times, increasing speed slightly each round. Let the brakes cool between cycles. Avoid hard stops and dragging the brake during the first few miles. Proper bedding-in reduces noise, improves modulation, and helps your new pads reach full stopping power faster.
Can I use standard mountain bike brake pads on an electric dirt bike?
No. Electric dirt bikes like the Surron LBX and Talaria MX4 weigh far more and reach higher speeds than bicycles, generating heat that standard MTB pads cannot handle. Using undersized pads leads to rapid brake fade, glazing, and rotor damage. You need pads and calipers rated for e-moto weight and speed. The DNIS rear brake kits for Surron LBX and Talaria models include a 240mm rotor and caliper designed specifically for these loads, which is the right approach for safe, consistent braking.